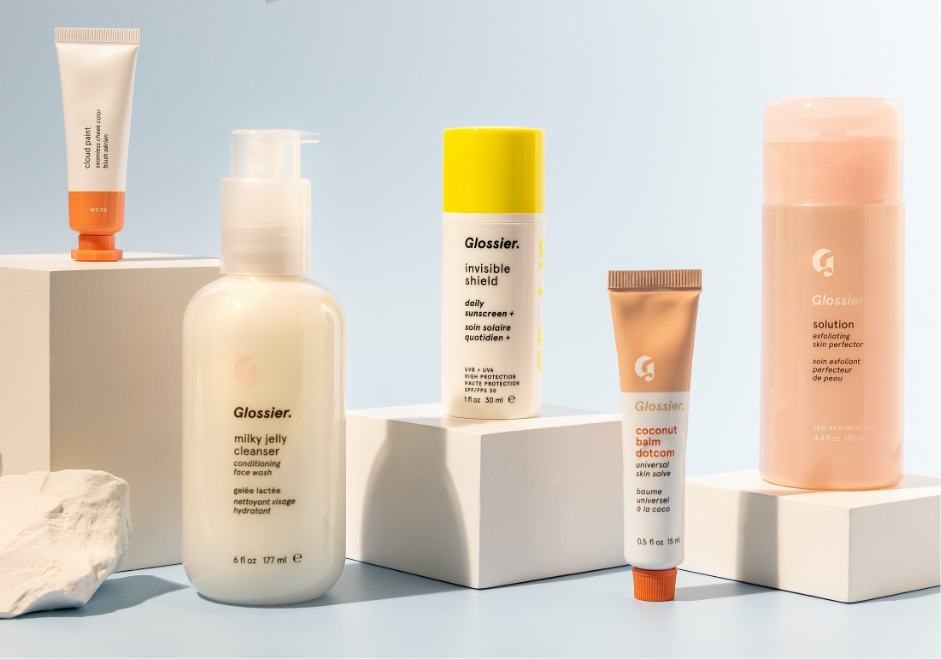
62% of Consumers in six major countries, including the UK, are more likely to buy a product if they can see its pictures or videos. That shows product photography’s importance to ecommerce businesses.
The average customer purchases items based on the “seeing is believing” principle. That means they’ll only buy what they can see. As a result, you’ll have difficulty convincing someone to buy a product they can’t examine with any of their five physical senses.
Product photography is a crucial element contributing to your ecommerce business’s profitability. That’s why we’re providing this detailed guide to ecommerce product photography.
From setup to editing and posting, here’s how to drive business growth with great product photographs.
Why You Need Excellent Product Photographs
It’s not enough to upload images of your products; you must use clear and detailed pictures in your online shop. Poor, pixelated photographs can discourage visitors from buying goods from your ecommerce store.
Primarily, the images shoppers see will influence their decision to stay on your website. You must set up your ecommerce store to be as eye-catching as possible. And the easiest way to achieve that is with intriguing product pictures.
- Etsy’s survey found that image quality influences 90% of their shoppers. So, you should expect customers to scrutinise product images on your ecommerce store before buying. You’ll likely lose such customers if the items’ pictures are poor and unintriguing.
- Furthermore, It’s easier to remember images better than words. You’ll likely recall a picture you saw that intrigued you better than the lengthy description under it. In the same way, the average customer is likelier to remember the product photograph than the description, no matter how well you write it.
- Lastly, the best ecommerce websites have excellent products and fascinating photos of the products. An Image can be worth a thousand purchases, depending on how good it is.
Things You Need for Your Ecommerce Product Photography Setup
Good gear is essential to producing excellent results. No matter how skilful you are, you can only go as far as your resources. That’s why you need good equipment to take top-quality ecommerce product photos.
- The first thing you need in product photography is a camera. You’ll use it to capture the photographs. The exception is if you plan to employ a talented digital artist to hand-draw images using computer software. But that’ll take time and can’t be picture-perfect like a camera. You can use a smartphone camera if you can’t afford a professional camera. The recent iPhone and Google Pixel cameras will deliver excellent pictures.
- The next important piece of equipment for DIY product photography is a studio set up with good lighting. You don’t need a major setup for one-off snapshots of a few products. You can always fix a temporary arrangement in the meantime.
- Other items you may need but are optional include a tripod stand, special camera lens, light reflectors and a softbox.
- You’ll also need editing software on your PC or smartphone and the ability to use them. In most cases, you’ll have to retouch the images to optimise them for your website and social media posts.
Guide to Ecommerce Product Photography
There’s no single best way to do product photography. It all depends on your skills, gears, product type and many other things. Here, we’ll explore the most fundamental product photography elements to consider.
Learn How to Take Product Photographs for Ecommerce Use
Product photography is a prominent profession with its technicalities, rules and whatnot. Hence, you have much to learn to be a professional at it. You don’t just get up one day, pick up a camera and decide you’re good at it.
To do product photography, you must first learn how to take good photographs. That, itself, involves the following aspects.
Choosing Between Picture Only or Lifestyle Product Photography
Ecommerce product photography features two primary style categories. The first involves product-only images, primarily pictures featuring the items on plain backgrounds.
The second involves lifestyle or contextual product images. This category features pictures of the product in use — for example, a lifestyle image of a shoe on a model’s legs. The product is the shoe, and the model is wearing it to show how good it looks.
It’s best to go for product-only photographs as they produce crisp, high-quality images. It’s also easier and cheaper to do product-only photography for ecommerce use. But, the product will also determine the most appropriate style to use for it.
For example, fashion items like clothes are best depicted in a mixture of product-only and contextual style images. That way, potential buyers can see the view product-only images provide and the use-scenario images that contextual styles offer.
Saturation Considerations
This aspect is primarily technical and best left to the professionals. However, if you intend to take on all your ecommerce product photography, you must learn it.
Saturation has to do with brightness and how the colours in the image combine. Depending on the camera you’re using and the lighting, you may not need to worry about this. However, you must at least understand how it works, so you don’t mess it up when editing the pictures.
Aside from saturation considerations, you must also learn lighting composition, shadows and colour palettes. We’ll look at them in the following points.
Understand Your’s Camera Abilities
You can’t maximise something if you don’t understand the full scope of its abilities. Hence, to get the best out of your camera, you must understand what the camera you have is capable of.
Because product photographs can increase your ecommerce revenue, a professional camera is worth the investment. But, regardless of your device, you must understand how to set the aperture, shutter speed and ISO speed manually.
These three elements are essential to excellent product photographs.
Aperture
This component controls how much light enters the camera. It works like the pupil in your eye, maintaining the field depth and determining what’s in focus and blurred out in the picture.
The higher the field depth, the better the focus. Hence you want to always set the aperture to the highest tuning for product pictures.
Shutter Speed
This feature controls how long the sensor stays exposed to light. A low shutter speed is ideal for snapping moving objects as it captures the motion blur. However, a high shutter speed is the best for product photography as it produces extremely sharp images.
ISO Speed
The ISO speed determines the image’s brightness and controls the camera’s light sensitivity. Lower ISO means the camera takes longer to capture an image, resulting in darker, more natural images.
Higher ISO adds noise to the image. Hence the photos get more saturation. However, that’s bad for product photography. So, you want to find the balance between an ISO speed that’s low enough to prevent graininess and high enough that images don’t come out too dark.
These three features are available in professional and most smartphone cameras. Find the correct configuration for these three features and keep them consistent for all the images you’re taking.
Setup Your Studio
A permanent studio setup is key for DIY product photography for your ecommerce store. The good news is you don’t need a professional studio setup. A rudimentary setup of the following items will still deliver excellent product photographs.
Plain Backdrop
White is the best backdrop for product-only images. A white background reflects light onto the product and ensures colour accuracy. The white colour will accentuate the original hue of the product and prevent colour spills or pronounced shadows.
For your setup, you can use a white sweep for the backdrop. Simply tape it to the wall, chair or wherever you’re using as the backdrop for the stage.
There’s no rule stating you must always use white. If you fancy other colours for the backdrop, go ahead and use them. But, a plain background helps the camera focus on the product when capturing the image.
Maximise Natural Lighting, But Don’t Rely on It
Photography means “drawing with light”. This makes light arguably the most vital element of photography in all forms. You’re capturing the light an image refracts into your camera’s lens, which determines your picture’s quality.
That said, natural lighting is often the best and cheapest. Set up your studio in an area with plenty of natural light. If you’re setting up a makeshift studio, you should work close to a window or door.
Relying on natural lighting means you can only shoot during the day in clear weather. Hence, you shouldn’t always rely on it. Buy a few artificial photography lighting sources. A basic two-light setup should be sufficient, and you can get them affordably online.
Use a Tripod
Product photography primarily involves still pictures. With a tripod stand, you can easily maintain the same camera angle for all the pictures you want to take.
You won’t need to move the camera. Simply place the product on the stage, adjust the lighting as necessary and take the picture.
A tripod stand saves you from repeatedly setting up and getting the right angle. Plus, it keeps the camera steady, and you don’t have to worry about taking bad pictures with unsteady hands.
Take Multiple Pictures and Evaluate
Now, you’re getting into the act. Chances are your first few shots won’t be good enough. Take multiple pictures and compare the results while capturing as many sides of the product as possible.
You won’t display only one image for each product on your ecommerce website. So why take one shot? Take as many as possible and compare them on your computer to see which is the best.
Try taking from different distances, angles and positions to see which produces the best depiction of the product. Although this idea may ruin your set-up, it will be worth it.
Retouch Pictures With Editing Software
Once you have images you’re happy with; you can proceed into post-production. Retouching can take your picture from average to world-class, depending on how skilful you’re at it.
During the retouching process, you can do colour correction, saturation adjustment, and removal of unwanted objects, amongst other things. Of course, it may initially seem tedious, but with practice, it’ll get easier and more enjoyable.
Ecommerce Product Photography Tips – Best Practices
The following tips will help you take the best product photographs.
Maintain a Consistent Style
The images you’re taking for your product serve more purpose than just showing the product to your customers. They ultimately contribute to your brand representation. Maintaining a consistent, unique style helps customers automatically recognise your products from the images.
To maintain a consistent style, you must have a template that accounts for all the key elements of a picture. Your template reflects your preference in the following categories.
- Saturation
- Colour Palette
- Composition
- Location and Context
- Image depth
- Image Angle
All these factors combine to make up the final product image. Maintain the same value for them to deliver a consistent image in all your pictures.
Be Original
Originality and consistency are two details to make your product photographs stand out from the ones on other ecommerce websites. Admittedly, originality doesn’t come easy, especially to novices.
You can achieve it with consistent practice and mix-matching different styles to create a new unique one. You can also borrow ideas from the internet and tweak them until you find a unique style.
Optimise The Images For Each Platform
Images straight from a camera are usually in large file formats like BMP, TIFF, EXIF or RAW. Pictures in this file format are often too heavy to put on your ecommerce website. Hence, you must scale the file sizes down and put them in the appropriate formats for web use.
JPG is the most acceptable image file type for web use. However, it’s a lossy format, so you shouldn’t convert your image directly from the original into JPG. Lossy file types lose quality with each save.
It’s best to leave the image in its original format and create a copy whenever you want to edit it on any platform. Then, you can edit the copy into the appropriate format for the platform.
- Open the original in Photoshop.
- Before you start editing, click on the “Save as” prompt in the program.
- Save the copy as JPG.
- Then you can start editing.
For Ecommerce Website
When optimising product photographs for your ecommerce website, your first consideration should be how it’ll influence the overall website’s performance.
Heavier pictures will cause the webpage to load slowly, especially on mobile devices. And that’s bad for business.
Lower site speed can cause a reduction in your conversions. Statistics show a site that loads in a second has a 5x higher conversion rate than one that loads in 10 seconds.
Reducing image size may also cause the picture to lose significant quality. You must balance the right quality and a size that won’t hinder your website’s performance.
You must also use different image visual sizes for different devices. The image size you’ll use for the desktop view should be different from or scalable to the right proportions for full view on mobile devices.
Social Media
It’s worth noting that photos and imagery are the most-used content types for audience engagement across social channels.
When optimising for social media, you must consider what’s best suited to each SM platform. For example, Facebook allows for lengthy captions and features a grid display showing up to 4 images at once. Size your product pictures to maximise that advantage.
The same applies to Twitter. But, since you can’t have a lengthy caption on Twitter, edit the product description in the images. Instagram displays only one photo per panel. It’s better to ensure the information you’re passing on via Instagram is 100% visual.
Pinterest is primarily a picture-sharing space, so you have much freedom there. You must be more creative with the images you intend to display on this platform.
PPC and Other Digital Campaigns
Doing product photography for this ecommerce aspect can be tricky as each advertising channel has different requirements for acceptable image sizes and options.
Understand each channel’s requirements and design your product images to fulfil them. Try to keep as much of the original image quality as possible. The goal is to ensure the ad channels accept the images and they’re still good enough to get clicks.
Appropriately Label Your Pictures
Images also contribute to SEO. But the search engine will attribute the picture to the meta description you attach to it. Use clear, concise and SEO-friendly descriptions for each product image.
Images and descriptions work together to help customers know your products. The better your description explains the picture, the higher your chance of selling to the customer.
Ask for Help Where You Need it
This tip is crucial to your ecommerce product photography success. DIY doesn’t mean you can’t ask for advice and insight from professional product photographers. If you’re at your wit’s ends and are stuck, call for help.
Online guides may not show you everything about ecommerce product photography. Don’t hesitate to ask a knowledgeable friend for ideas if you can’t get a professional to assist.
And if you just can’t seem to get it right, hire a professional and understudy them while they’re working. You’ll pick an idea or two from their methods.
Grow Your Business with Great Product Photography
There’s no single best way to do ecommerce product photography. As a starter, you’ll do a lot of trial and error. You’ll also make a few mistakes along the way. Exercise patience, practice, learn from your errors and improve consistently.
Consider your customers and audience first in all you do. The pictures are not for you — they’re there to sell products to your customers. Capture images that are worth a thousand purchases.
The Axis Shift team can deliver more comprehensive advice to help your ecommerce business drive more sales. We offer investment partnerships to transform struggling ecommerce companies into profit powerhouses. Call 020 805 05795 to learn more about how we can help you grow.


